But first… where have I been?
Hello! Long time no write… it looks like I haven’t posted since August 2020 and it has been a very busy couple years. Just a few highlights: I’ve gotten married, bought a house, and started two new jobs (one after the other, not concurrently 😅). It can be really hard to maintain creative energy when life is chaotic and I stopped writing because it started to feel more like a chore than a creative outlet.
I didn’t completely abandon the idea of sharing my crafting projects during my hiatus; I started creating short-form content for TikTok (my handle is @torrey1028 if you are interested). I’ve had a lot of fun with it, especially as I’ve started playing more with things like interesting camera angles and pacing. It is hard to express everything I want to in such a short format though, so back to writing it is!
Why quilting?
I decided to try quilting because I’m at the age where it seems like everyone is getting pregnant; we’ve had three babies in my friend group in the last year and another on the way. Initially I set out to knit blankets and hats and socks… but knit blankets take forever and are usually not very durable (or machine washable) and socks and hats are grown out of all too quickly. Quilts seemed like a good alternative, so I set about making a tester to see how much of a challenge it would be.
Fabric selection
I went to my local craft store to pick my fabrics. They have a whole quilting section and sell a lot of their fabric as fat quarters.
As a side note… fat quarter is a really strange name so of course I had to look up the origin. Imagine you have a yard of fabric and want to divide it into quarters. There are two ways of doing this. One is to measure a quarter yard along the bottom of the fabric, cut, and repeat. This leaves you with 4 pieces of fabric that are 9 inches wide and as tall as the fabric roll. The second way is to cut the fabric in half, turn the two pieces, and cut it in half again. This results in pieces of fabric that are 18 inches wide and half the height of the fabric roll which is fatter and shorter quarter yard than the first method.
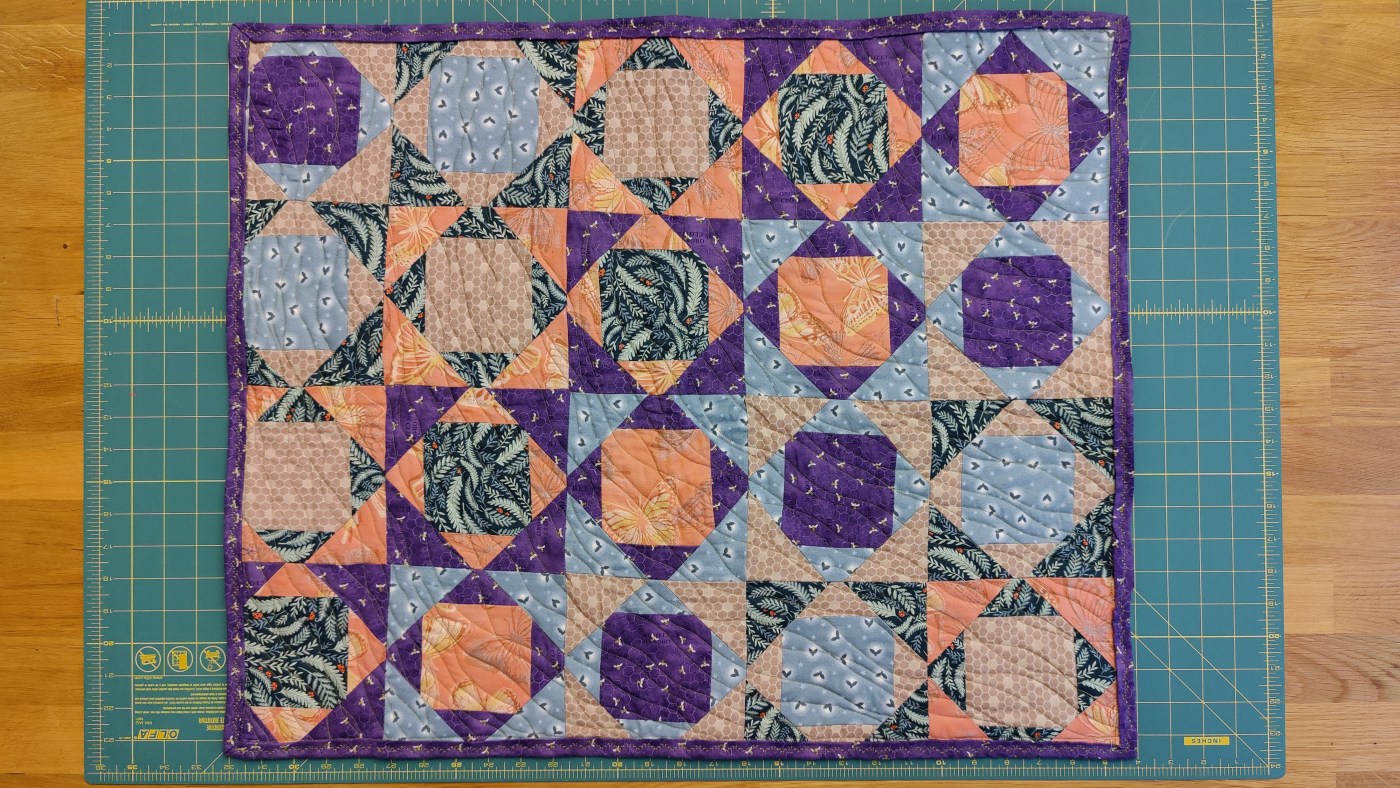
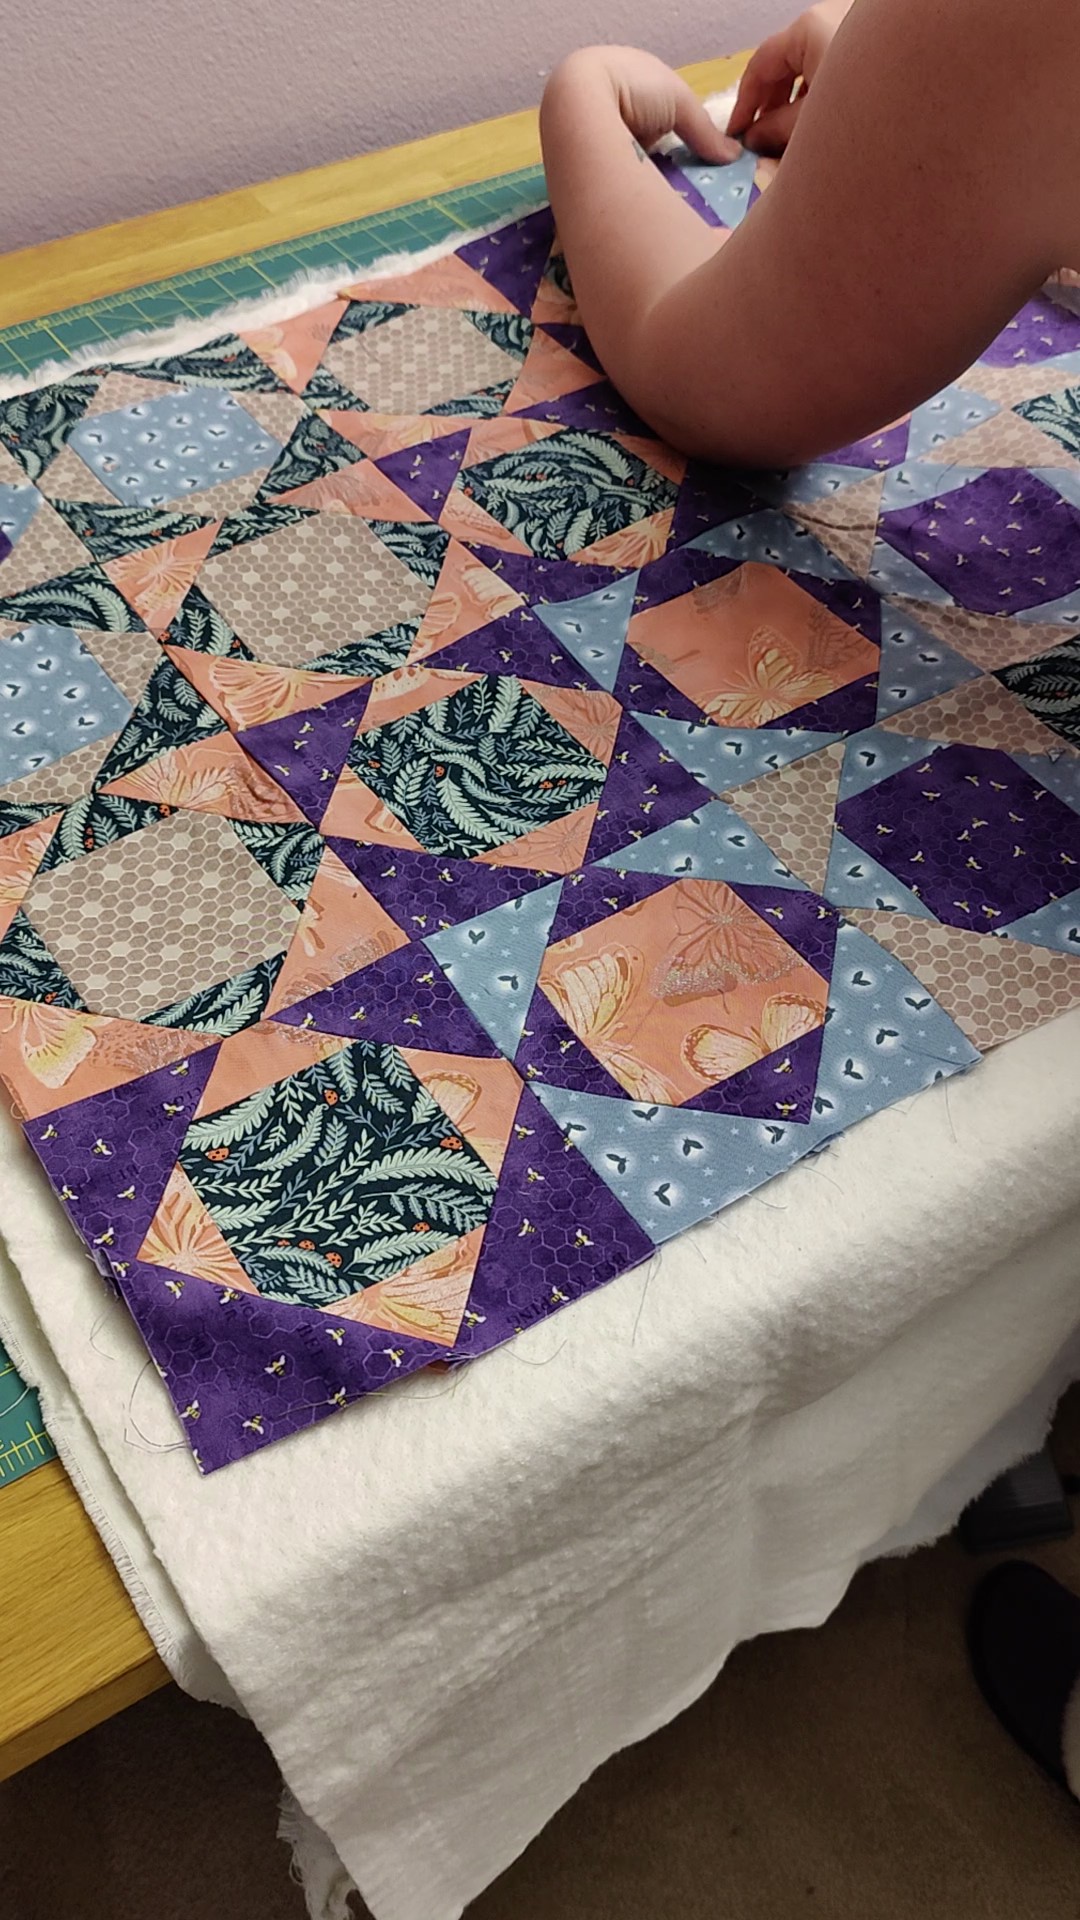
Anyway, back to the fabric on hand. The store very helpfully groups its fat quarters by theme and color so I picked a selection from the bug themed fabrics. I tend to be drawn to flashy colors and have a hard time simplifying my selections to create a cohesive color pallet. I think the colors I chose work fine, but the quilt did end up quite busy. For future projects, I think I’ll study more about color theory (or bring my friend Liz along to just tell me what to buy).

Designing my quilt
Since I bought the same amount of each fabric (except the extra purple to use for a binding), I wanted to come up with a design that would use each color evenly. I decided on a pattern of squares and triangles that would let me rotate through the colors. Since there were five total colors, I cut enough pieces to create twenty squares (twenty because it is divisible by five). The cutting was pretty easy because each triangle was just a half or quarter of the larger square shape.
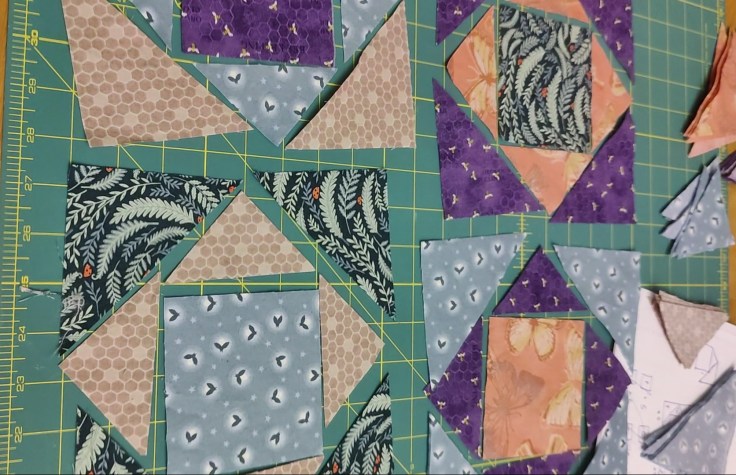
After all the pieces were cut out, I started laying out the squares with different color combinations until I was happy with how the color lined up. Because of the way the colors rotated in the squares, each color shared sides with two other colors throughout the quilt. The pink fabric ended up being the most challenging color to match, so I decided on the square configurations containing pink first and worked backwards from there.
I think this design could be very effective for doing some sort of gradient where colors fade slowly into the next until you get back to your first color. I might try something like that with purples and reds in the future.
Piecing and pressing
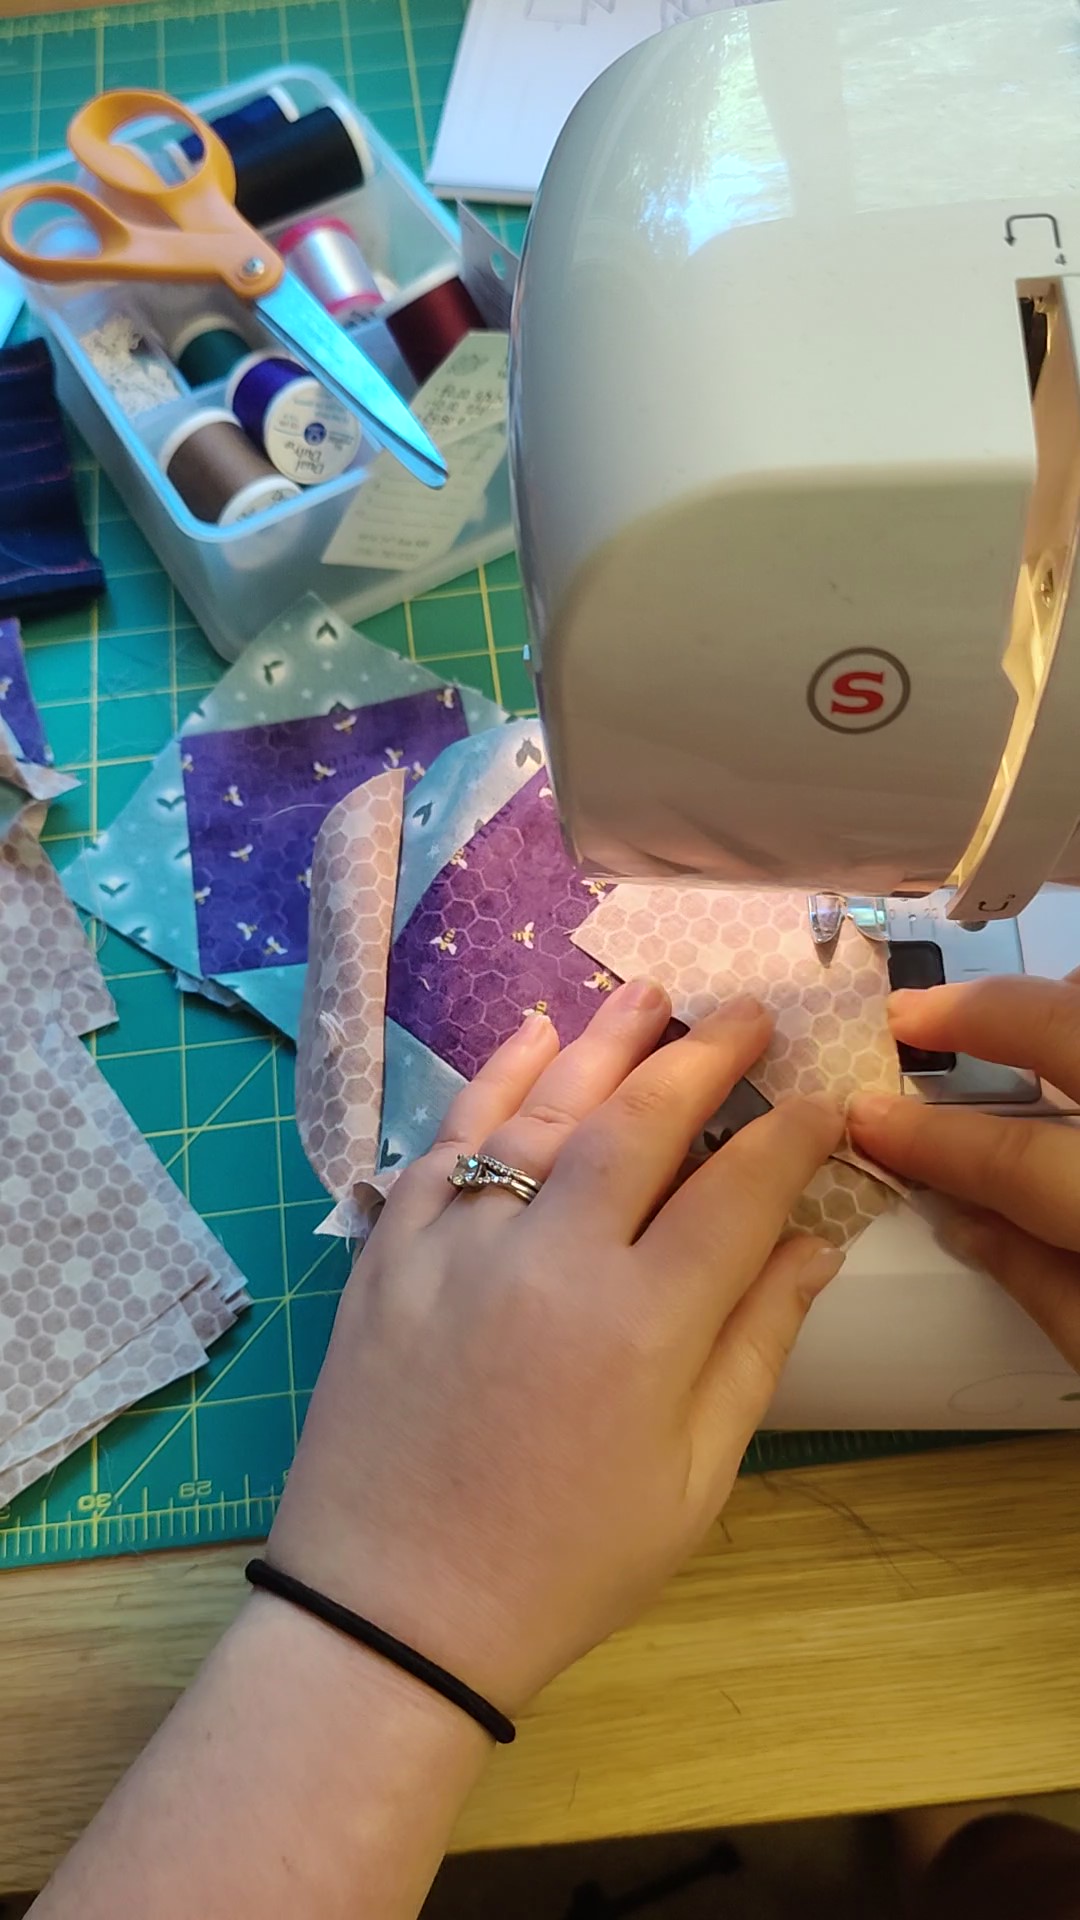
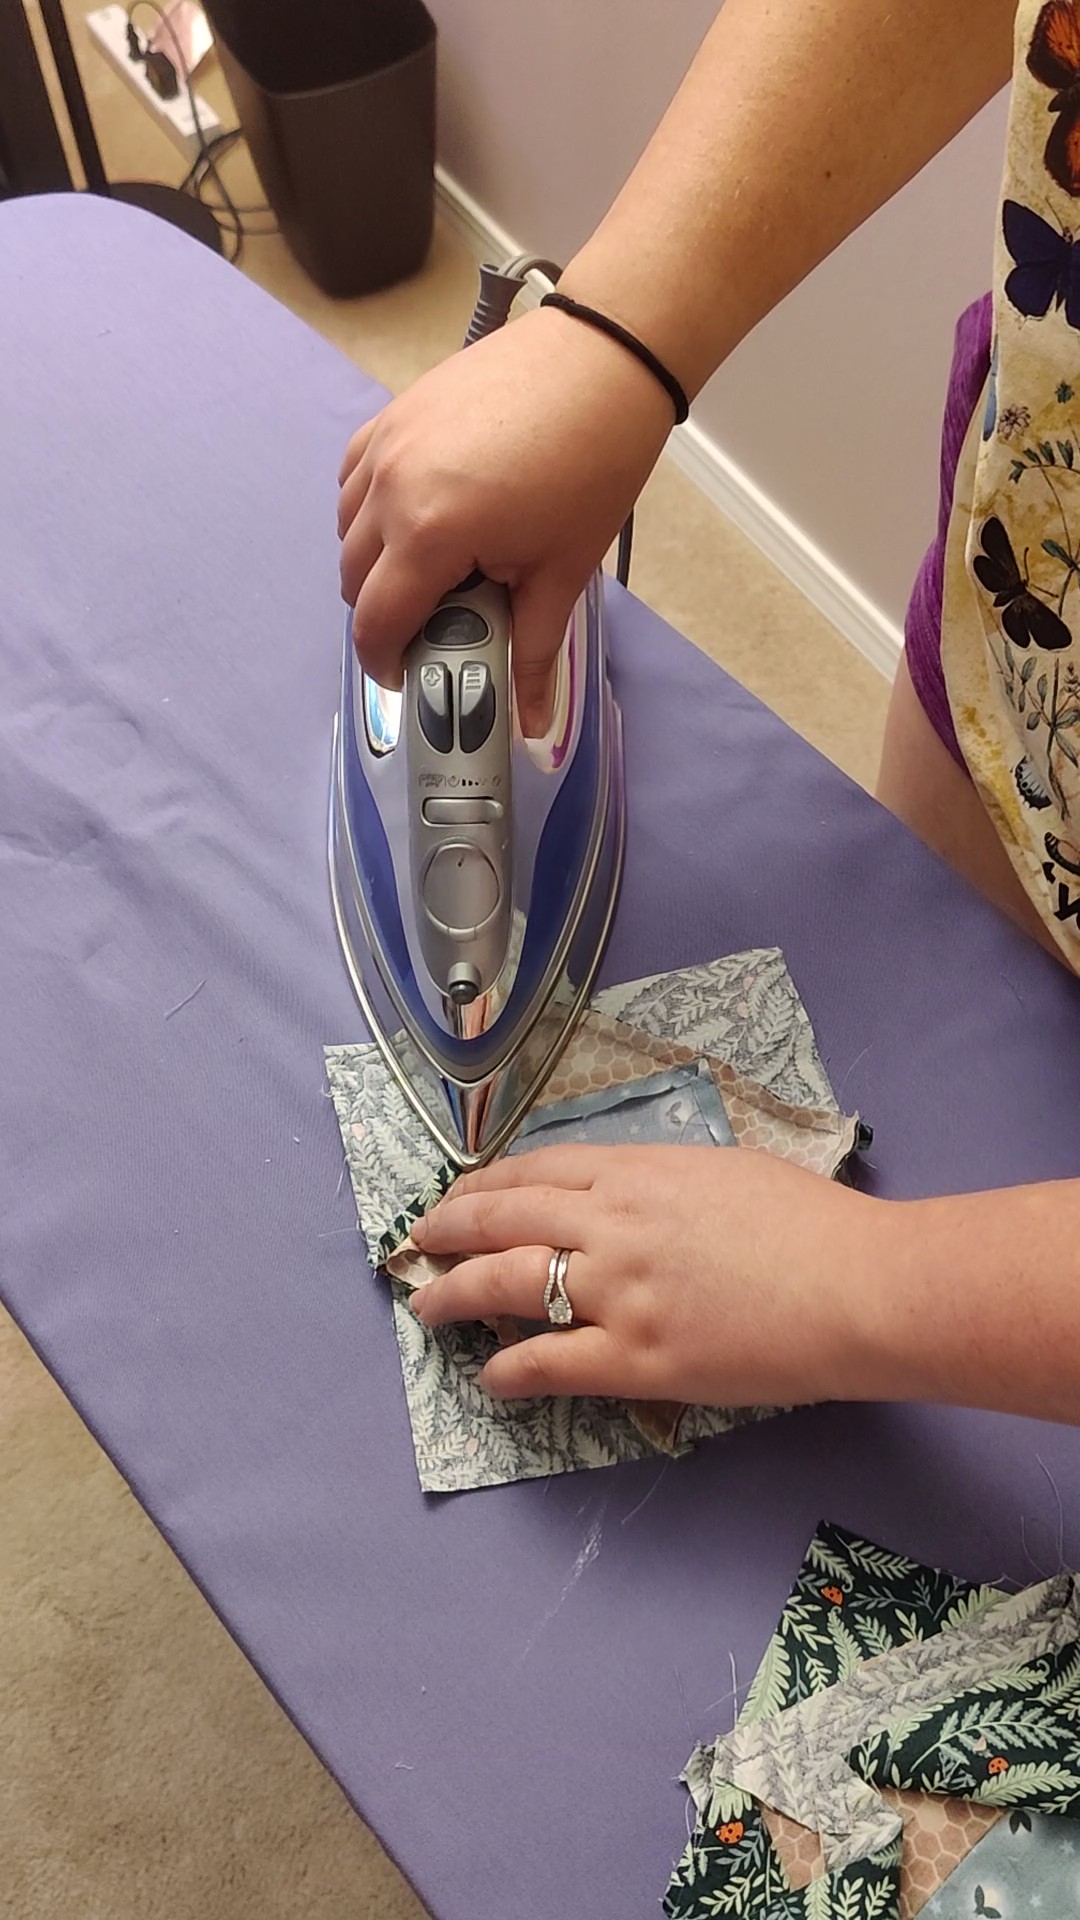
Once I had all my pieces cut out it was time to sew, press, and repeat. For each color combination, I started with the square in the middle, attached the four smaller triangles, pressed, attached the four larger triangles, and pressed again. Initially I was pressing the seams outward because it was easier, but I switched to pressing the seams open because I got it into my head that you are always supposed to press seams open. In retrospect, it would have saved me a lot of time and been cleaner if I had just stuck to seams pressed outwards.
When I finished all twenty squares, it was time to assemble the final layout. My first challenge came with lining up the points that bisect the sides of each square. After several attempts, I determined it was nearly impossible to get the points to match exactly so I relaxed my standards and moved on. Once the first row was complete, I had the additional challenge of making the corners of each square line up properly. To deal with this I decided to add new squares to the layout one by one (as opposed to sewing the entire second row then attaching it to the first row). This method worked pretty well, but I feel like there’s a better technique to ensure higher precision when assembling a design like this. I will have to do some more research.
Quilting!
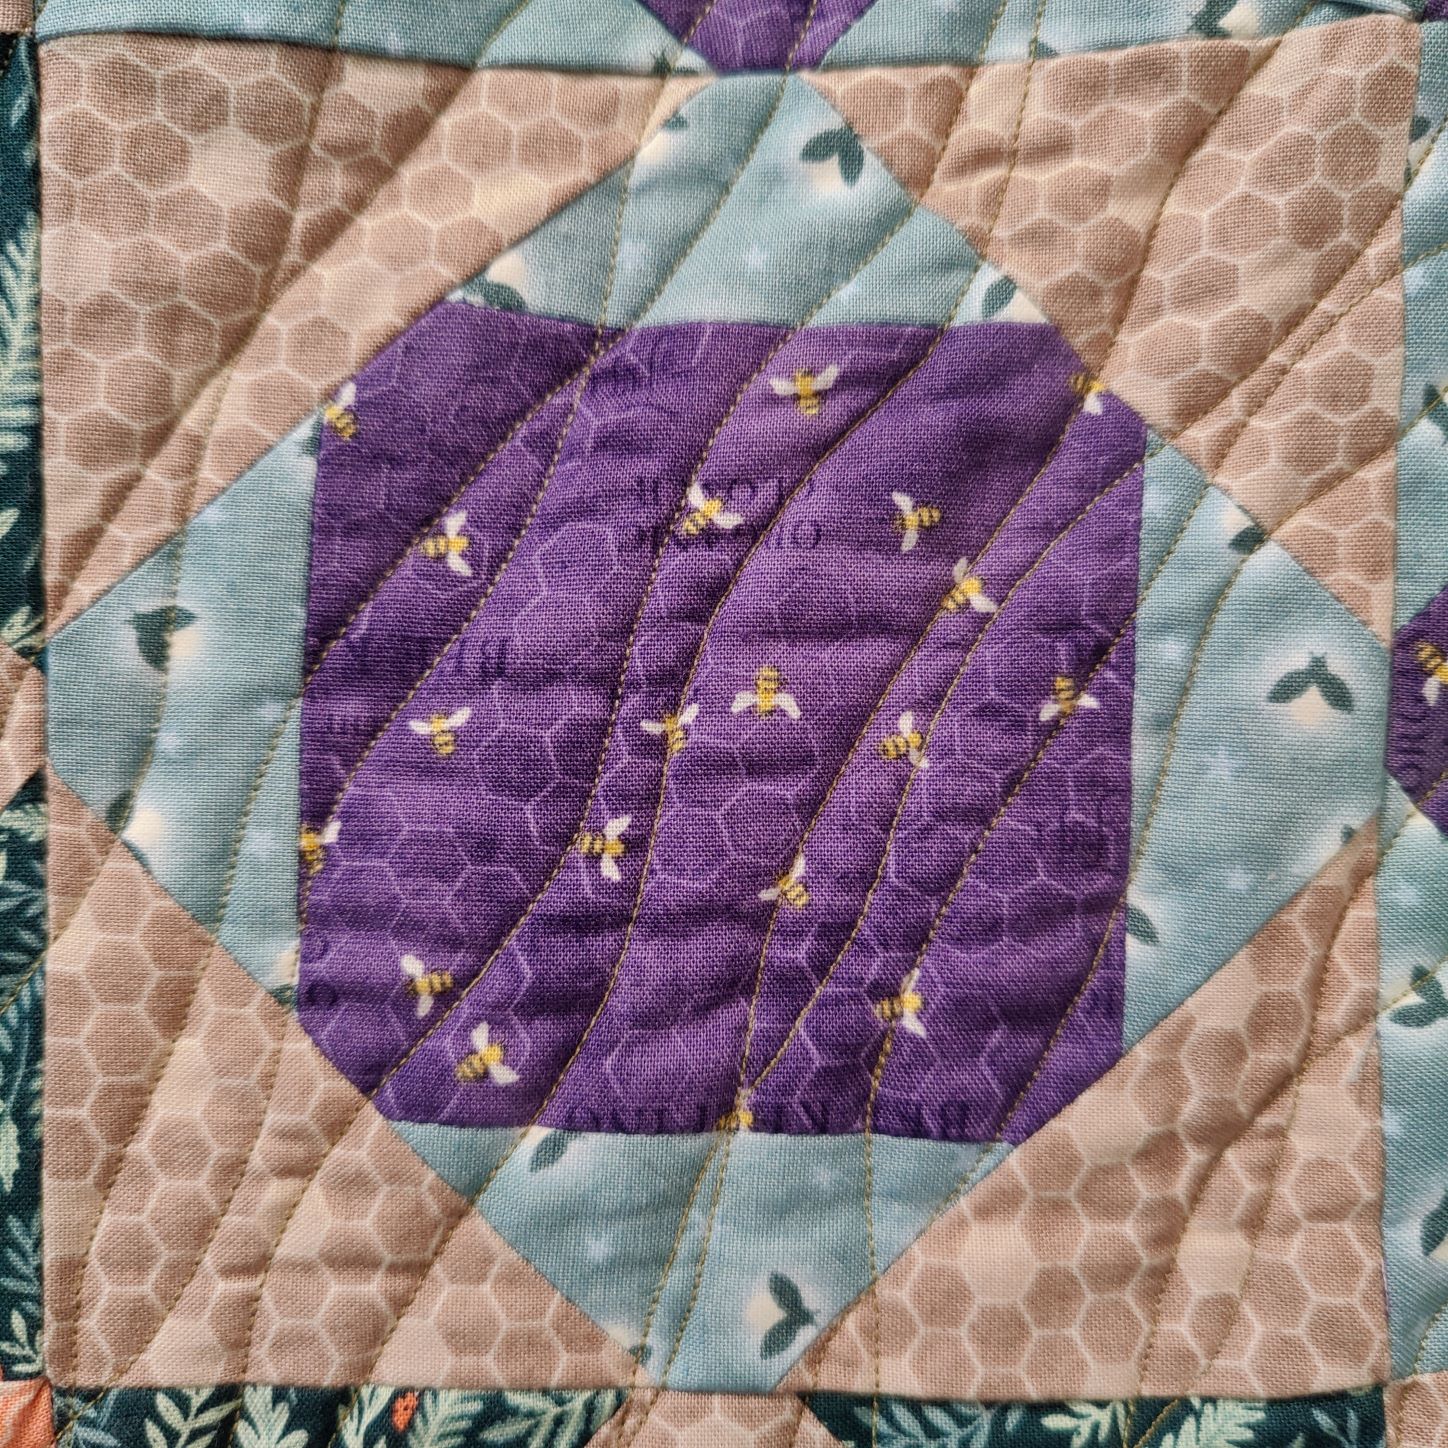
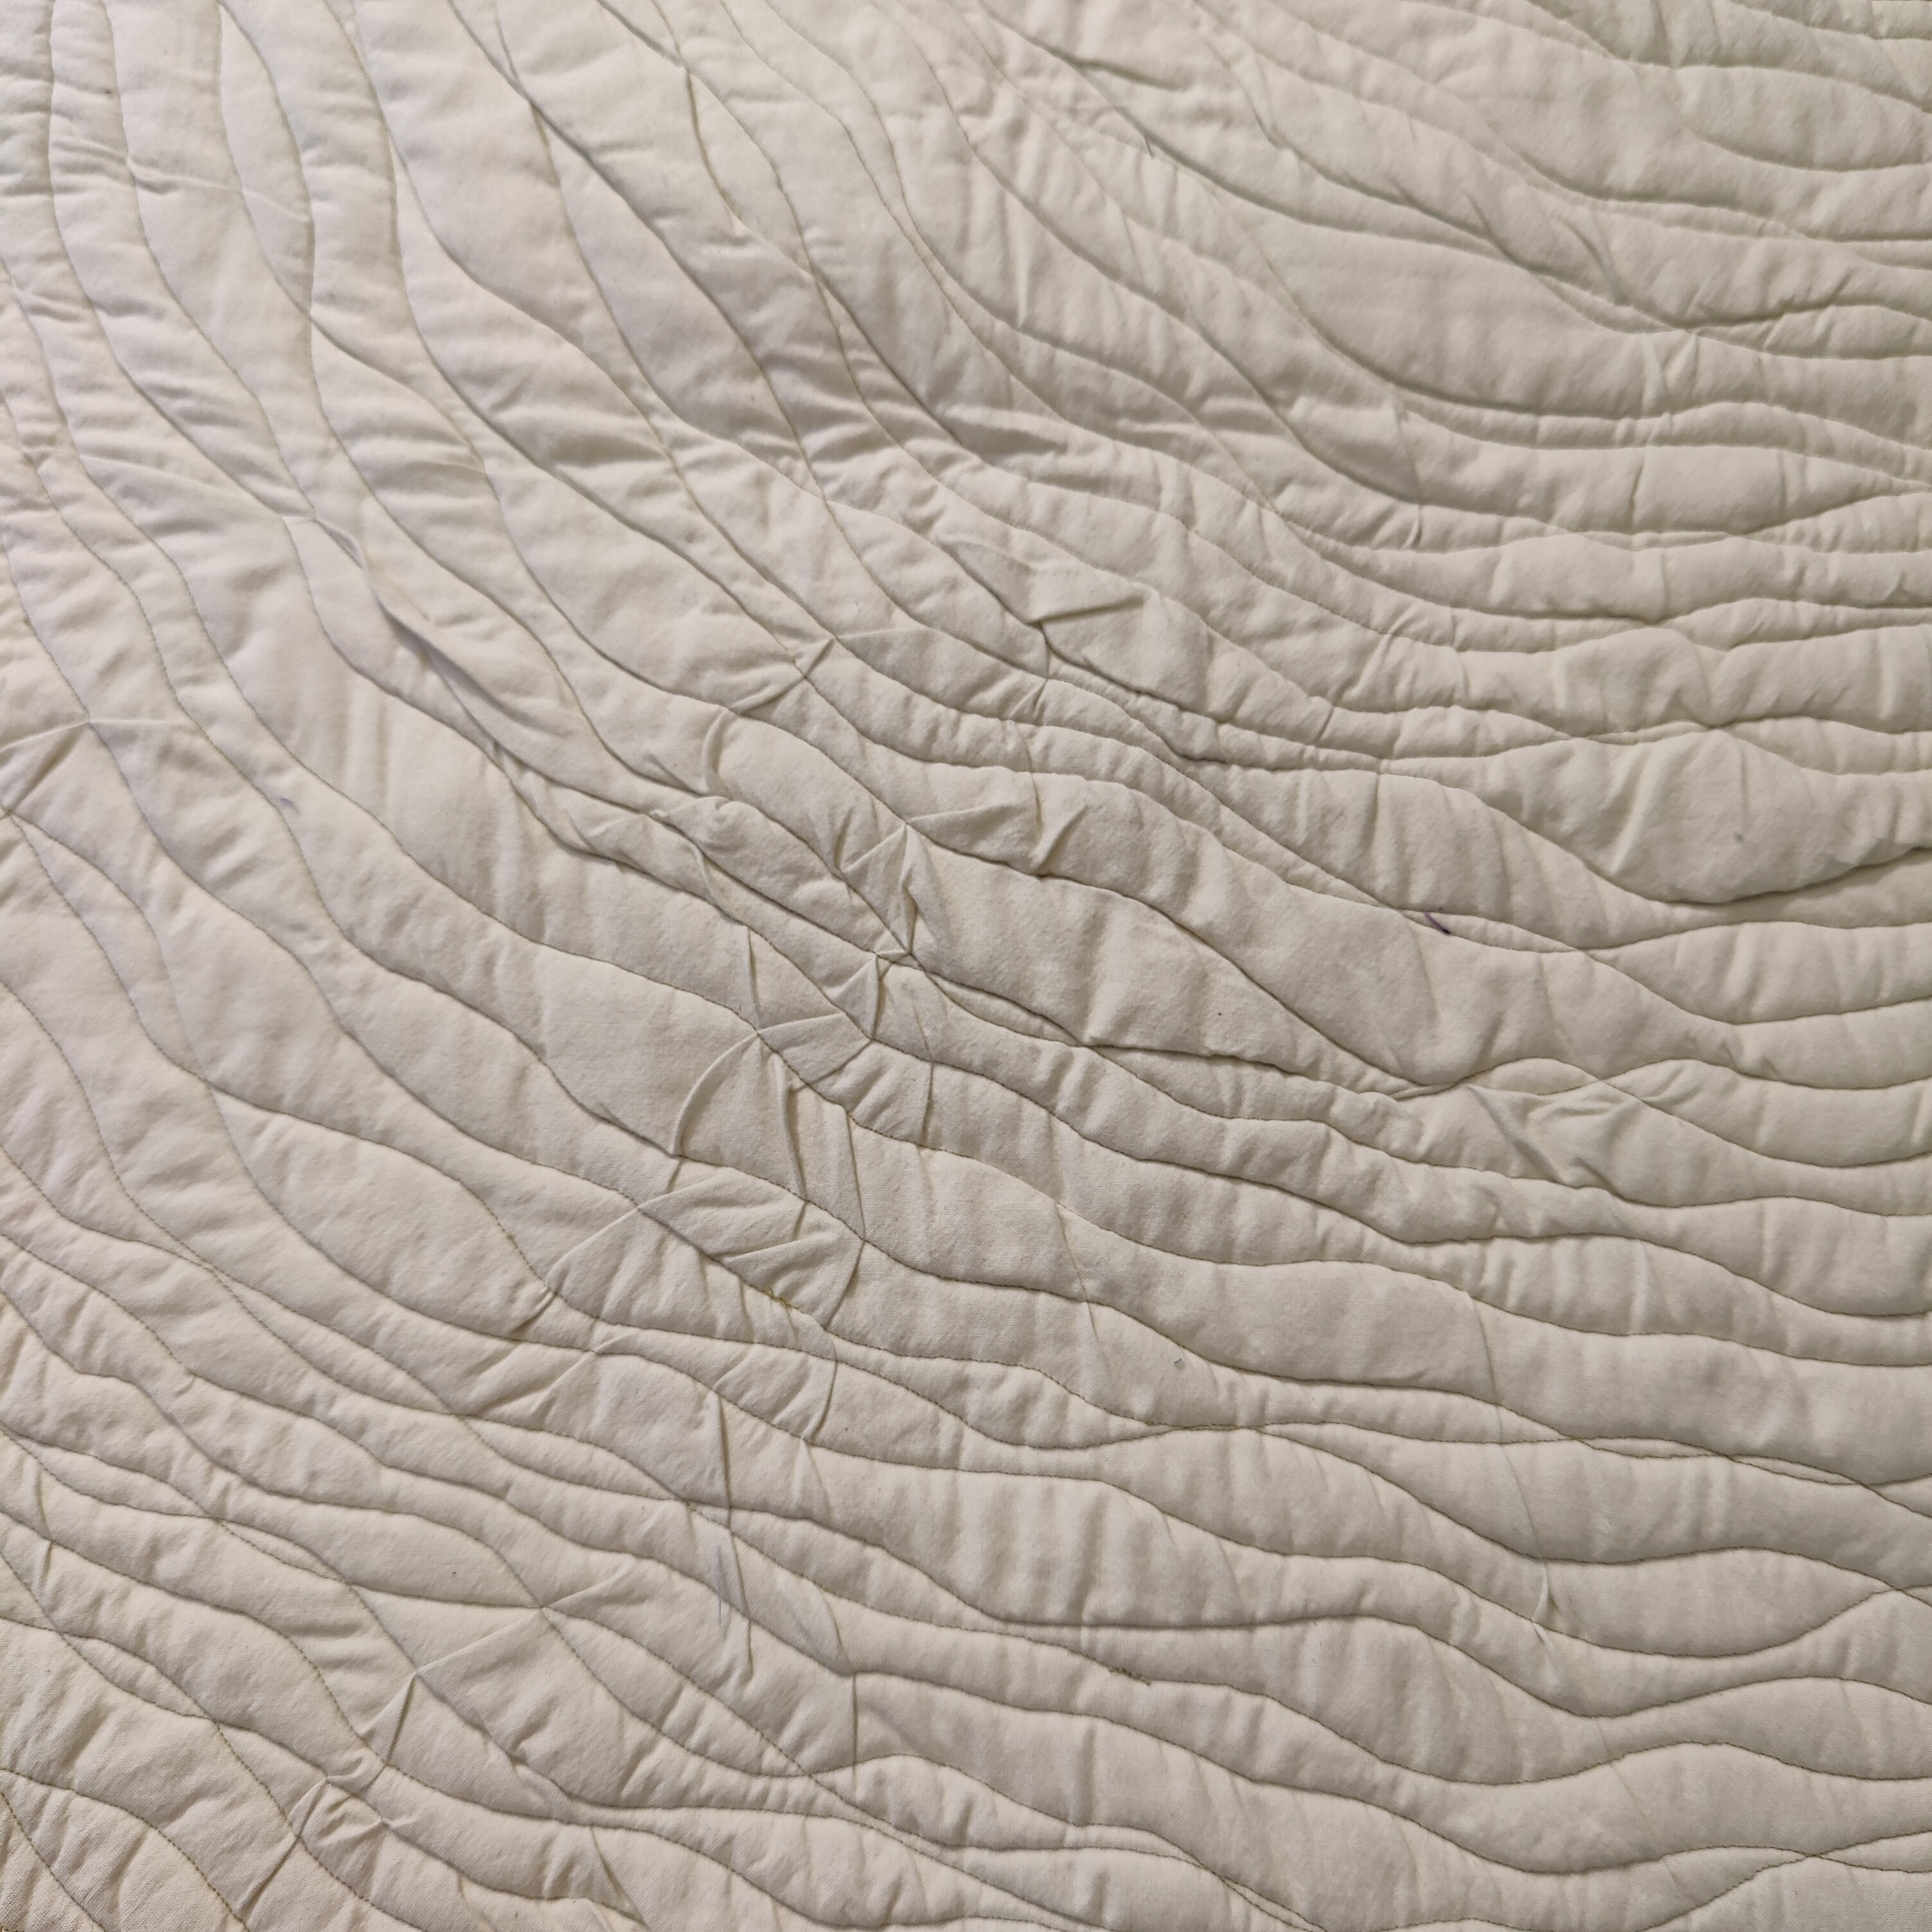
It turns out that quilting is my favorite part of this whole process. There is something about sewing random lines over a carefully constructed fabric pattern that is just so satisfying… Anyway, for this quilt I decided to go with an organic wavy quilting pattern to contrast with the geometric fabric layout. I cut my backing and batting to size and basted the whole thing together, forming my sandwich. From there, I started in one corner and worked my way diagonally across the piece. For a first attempt at quilting it when pretty well, but there are definitely areas to improve:
- Start in the middle, not the edge – by the time I reached the middle of my sandwich, everything had slipped around by a decent amount and was pulling at the basting. Some of the pulling could have been avoided if I started in the middle and worked my way out.
- Press everything – I didn’t press the backing before I started which I think also contributed to it bunching up and pulling every which way.
- Leave extra room when cutting the batting and backing – more room is always better and will make it easier to recover from some part of the sandwich slipping around.
- For the love of god, don’t take out the basting/pins/etc. holding the sandwich together – when I got to the halfway mark and noticed that everything had slipped around a bit, I decided to just take the basting out and continue from there. That was a huge mistake and the backing started bunching up worse than ever.
- Everything is easier if it’s flat – I was sewing on a table top which made moving the fabric up and over the sewing machine. I have since gotten a table with a drop down for my machine. I think it will make the quilting process much smoother.
- Use the right tools for the job – I created this pattern using a standard foot which worked ok, but I think a free motion foot would have made the process a little easier.

Last but not least: binding
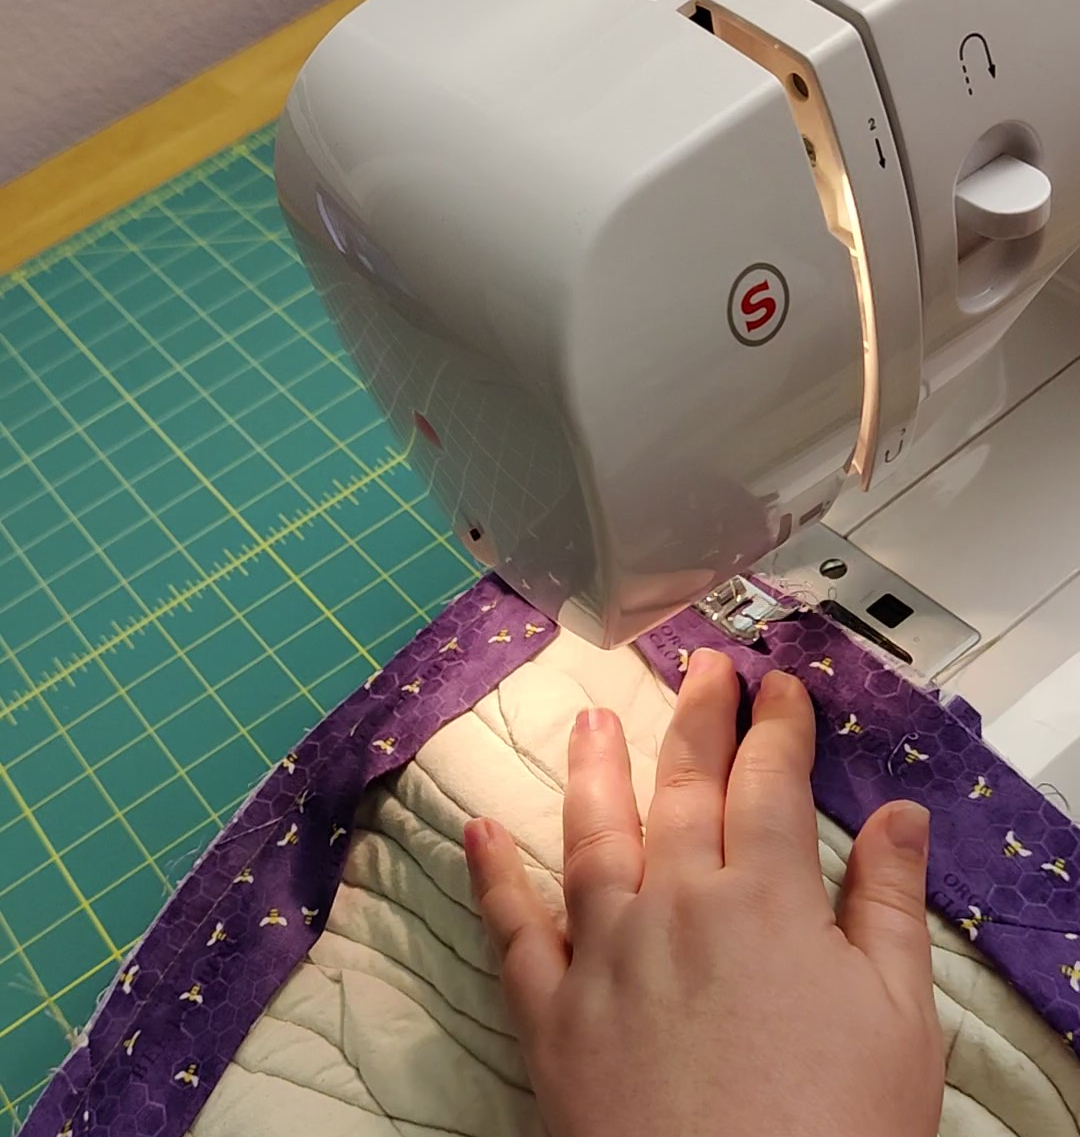
According to an article I found, the continuous strip binding method is durable and can be done entirely on the machine, sold! I cut up the extra purple fabric and assembled it into a binding strip. I sewed the strip to the back of the quilt, leaving room to create mitered corners. Then more pressing to get the binding to fold over to the front of the quilt nicely. And I finished the binding with an angled double cross stitch (I had to look up the stitch name in Singer’s stitch reference). I stitched down the middle of the binding which looks fine, but in future quilts I will try stitching over the binding edge instead to make it lie a bit flatter.
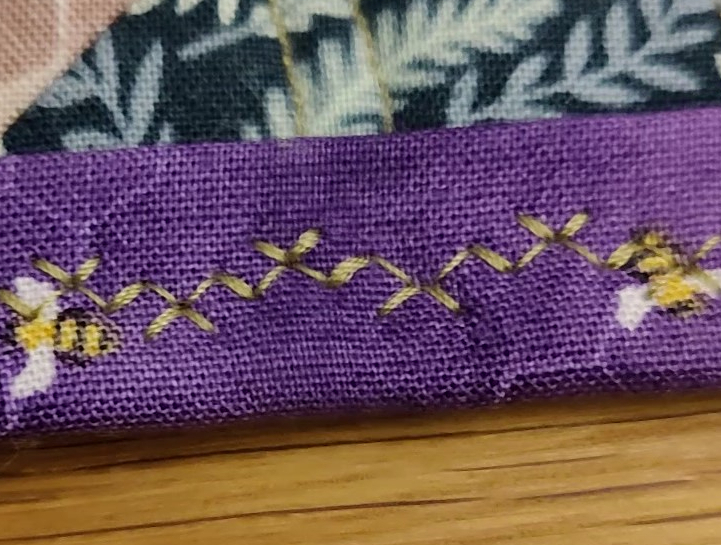
With the binding complete, I finished my first quilt! I really enjoyed the process and I think it’s safe to say that I will be adding quilting to my crafting rotation 🙂


Hi Becky,You continue to amaze me with all your creativity in everything you do! I love the quilt and your directions on how you did it!How is your new job? What are you actually doing for the company?Much love, and hugs,GrandmaSent from my Verizon, Samsung Galaxy smartphone
LikeLiked by 1 person
Hey Grandma! The new job is great 😃. I’m working on developing a new kind of industrial loom that can weave in 3D instead of flat fabric! I’m focused on the firmware part which makes everything move according to a pattern given by the operator
LikeLike