
I’m super excited to write this post; I got to help warp up a very big floor loom back in November and it was awesome! It was so exciting because the whole thing appealed to both my creative and engineering tendencies. For my creative folks: the loom is able to weave very cool and intricate patterns in shawl and blanket sizes based on designs creating in a software program. For my engineers: the loom runs on compressed air, connects via parallel port to a Windows XP machine, and is extremely interesting from a mechanical point of view.
 This is a view of the loom from the front. A few vocab words to start: the yarn running all the way to the back is called the warp and the yarn that is pulled side to side is called the weft. The warp is wrapped around the large roller in the back and is slowly pulled forward as the cloth advances. The warp is threaded through the beater in the front which holds each thread evenly apart. Behind the beater are the shafts and heddles. They are responsible for raising different threads up to allow the weft to pass underneath and create the design on the cloth. This loom has 24 shafts that can all be raised independently. The number of shafts determines how complex the design can be. For the computer engineers out there, 24 shafts is the same as saying you have a 24 bits to play with rather than the 4 or 8 bits that most manual looms have.
Step 1: Winding the Warp
Unfortunately I didn’t think to take a picture of this process, but I’ll do my best to describe it. There are 900 threads that make up the warp in this design. We wound the warp on in sections with 36 threads in every section. In the photo above, you can see that each section is separated by a metal loop. The loops are placed at 2 inch intervals and we wound 25 sections so the design is 50 inches wide. The tension in the warp during winding is really important and needs to be consistent all the way across so that the design comes out evenly during weaving. To achieve this, we ran the 36 threads at a time through a tensioning device that had the same setting throughout.
Step 2: Threading the Heddles
This part took the longest by far. Each of the 900 threads had to be threaded through a heddle on the appropriate shaft in the right order.

I threaded loom in groups of 16 so I could triple check my work, definitely didn’t want to make a mistake early in the process and throw off the rest of the design! The photo above is taken from where I was sitting while doing the threading: between the back roller that the warp was wound around and the shafts. The shafts are essentially wooden hanging frames with metal bars that the heddles can float back and forth on. The heddles are the skinny metal pieces that the warp is threaded through. For this design, we were using the first 18 shafts. The computer program that the design was made on worked out which shafts should be threaded in which order.
Step 3: Threading the Beater
Now that everything is threaded through the heddles, they also need to be threaded through the beater. The beater is used to beat the weft into place later in the process.
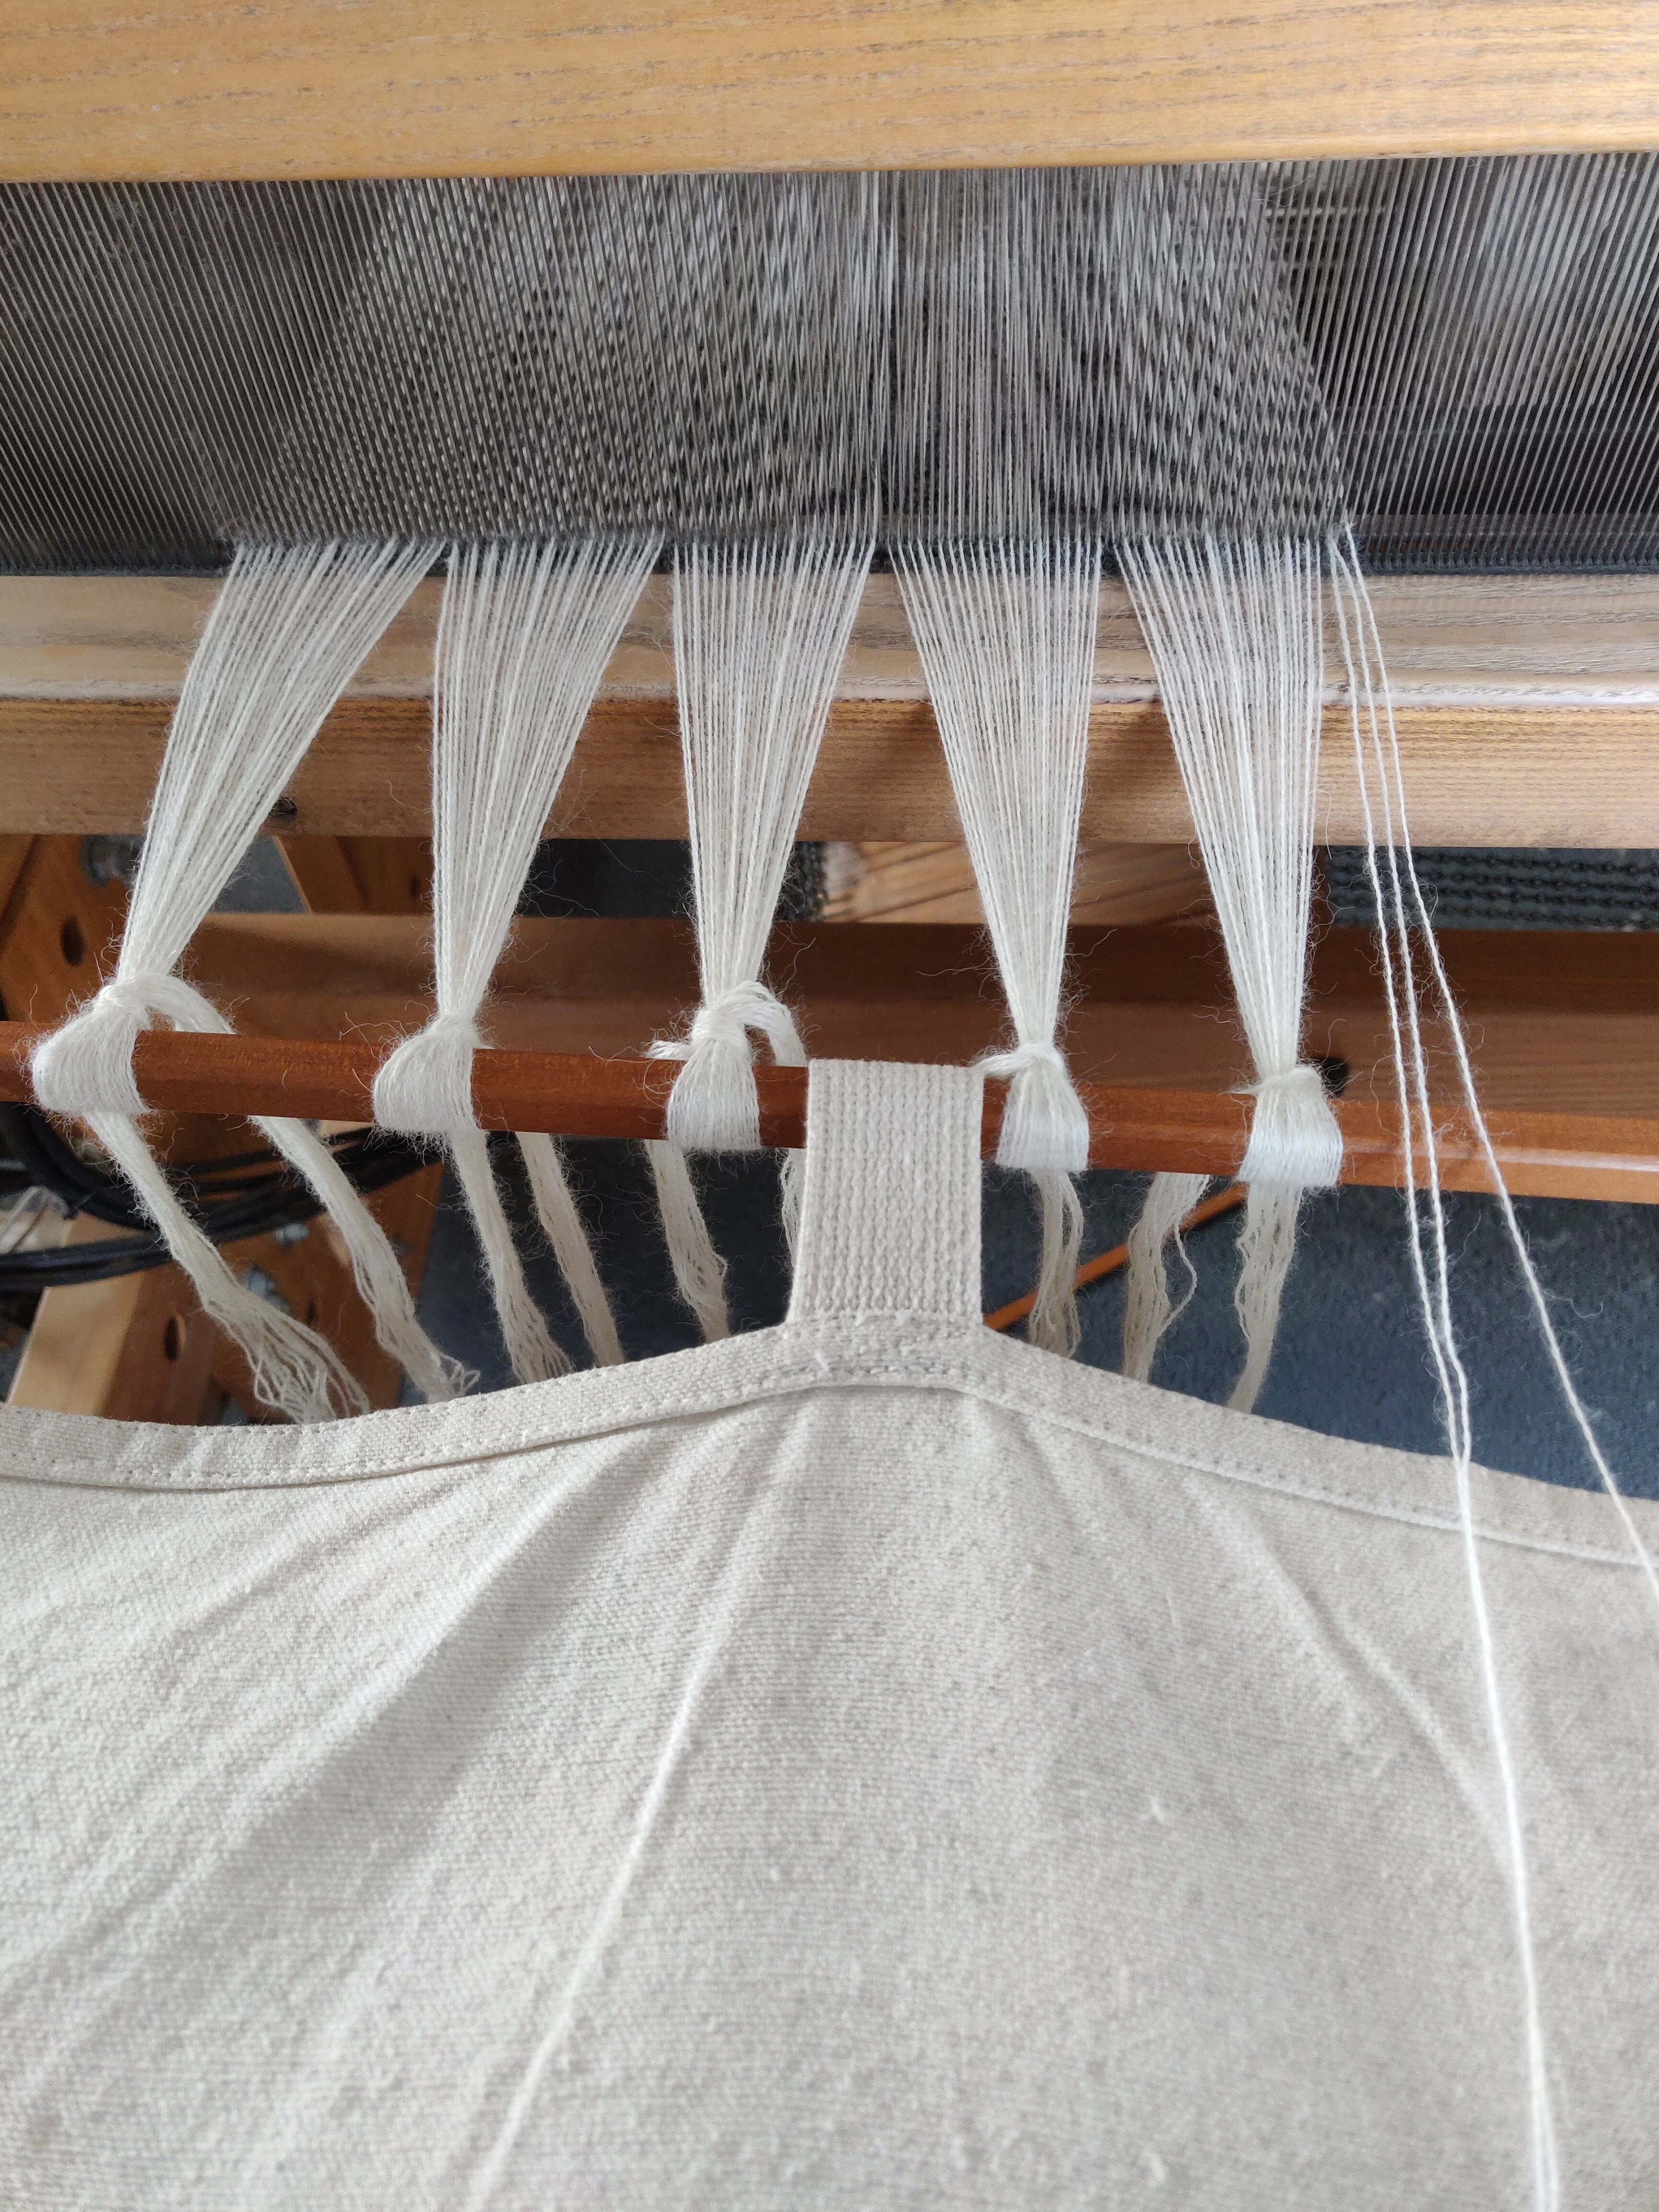
If you look really closely, you can see that I’m threading the beater in a one/two pattern meaning that the first space has one thread and the second space has two threads, repeated. This is because the comb on the beater has 12 teeth per inch and we need the warp to be spaced at 18 threads per inch (900 thread divided by 50 inches is 18) . The threads are then tied around the cloth beam and tightened evenly.
Step 4: Weave!
I can’t embed videos on this site (something about not being a premium account…) but here is a link to a video of the loom running! I took the video from the side because it was easier to see the movement. The shafts are raised first creating enough space between the top and bottom threads for the shuttle to fit. The shuttle is then fired across the warp. The shuttle has yarn inside that gets pulled out as it travels across. The beater is then moved forward to straighten the line of yarn the shuttle left behind. Last, the cloth is advanced a very small amount, and the process repeats! In the end, there will be a large roll of cloth that will need to be cut apart into individual blankets.
I really enjoyed learning how the loom worked and I think I need to get one when I get home. Probably not one quite so large and probably not fully automated the way this one was… but still, I want a loom!

The loom is much bigger than I thought it would be. I’m impressed with how much you leared about the workings of a loom. Thanks for sharing with us! It was so good to see you!!Love and hugs,GrandmaSent from my Verizon, Samsung Galaxy smartphone
LikeLiked by 1 person
Yeah it’s enormous!
LikeLike